Games and DLC
Installing Games For Aurora
Installing Games For Aurora
Downloading the app
- You will need to download ISO2GOD
- Extract the download into a safe location and open the app
Converting the ISO
- Extract your iso if its inside a zip
- Open ISO2GOD.
- Drag the ISO into ISO2GOD.
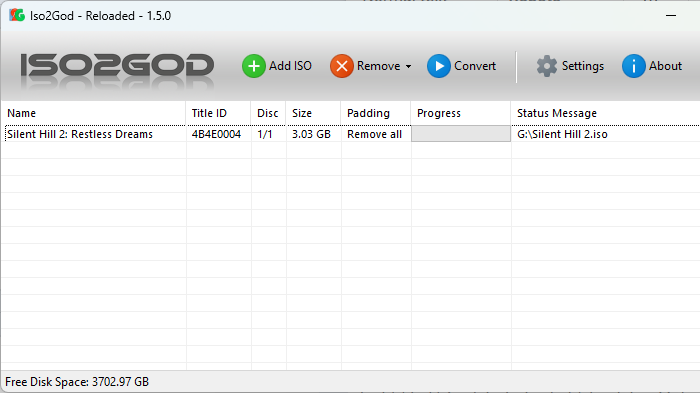
- It will pull up a screen with info on the game you are converting, make sure everything looks correct, such as title and the logo and press add
- You should see your game in the app with a title id and the size
- Press the convert button
Moving the files
- Once it is finished, it should say "finished," and you should see a folder named "god" in the ISO2GOD directory.
- Find the folder with the title id
a title id should look something like 415608c3
- If you store your files on your internal hard drive connect to FTP.
- Or if you store your files on a flash drive plug in your flash drive to your computer
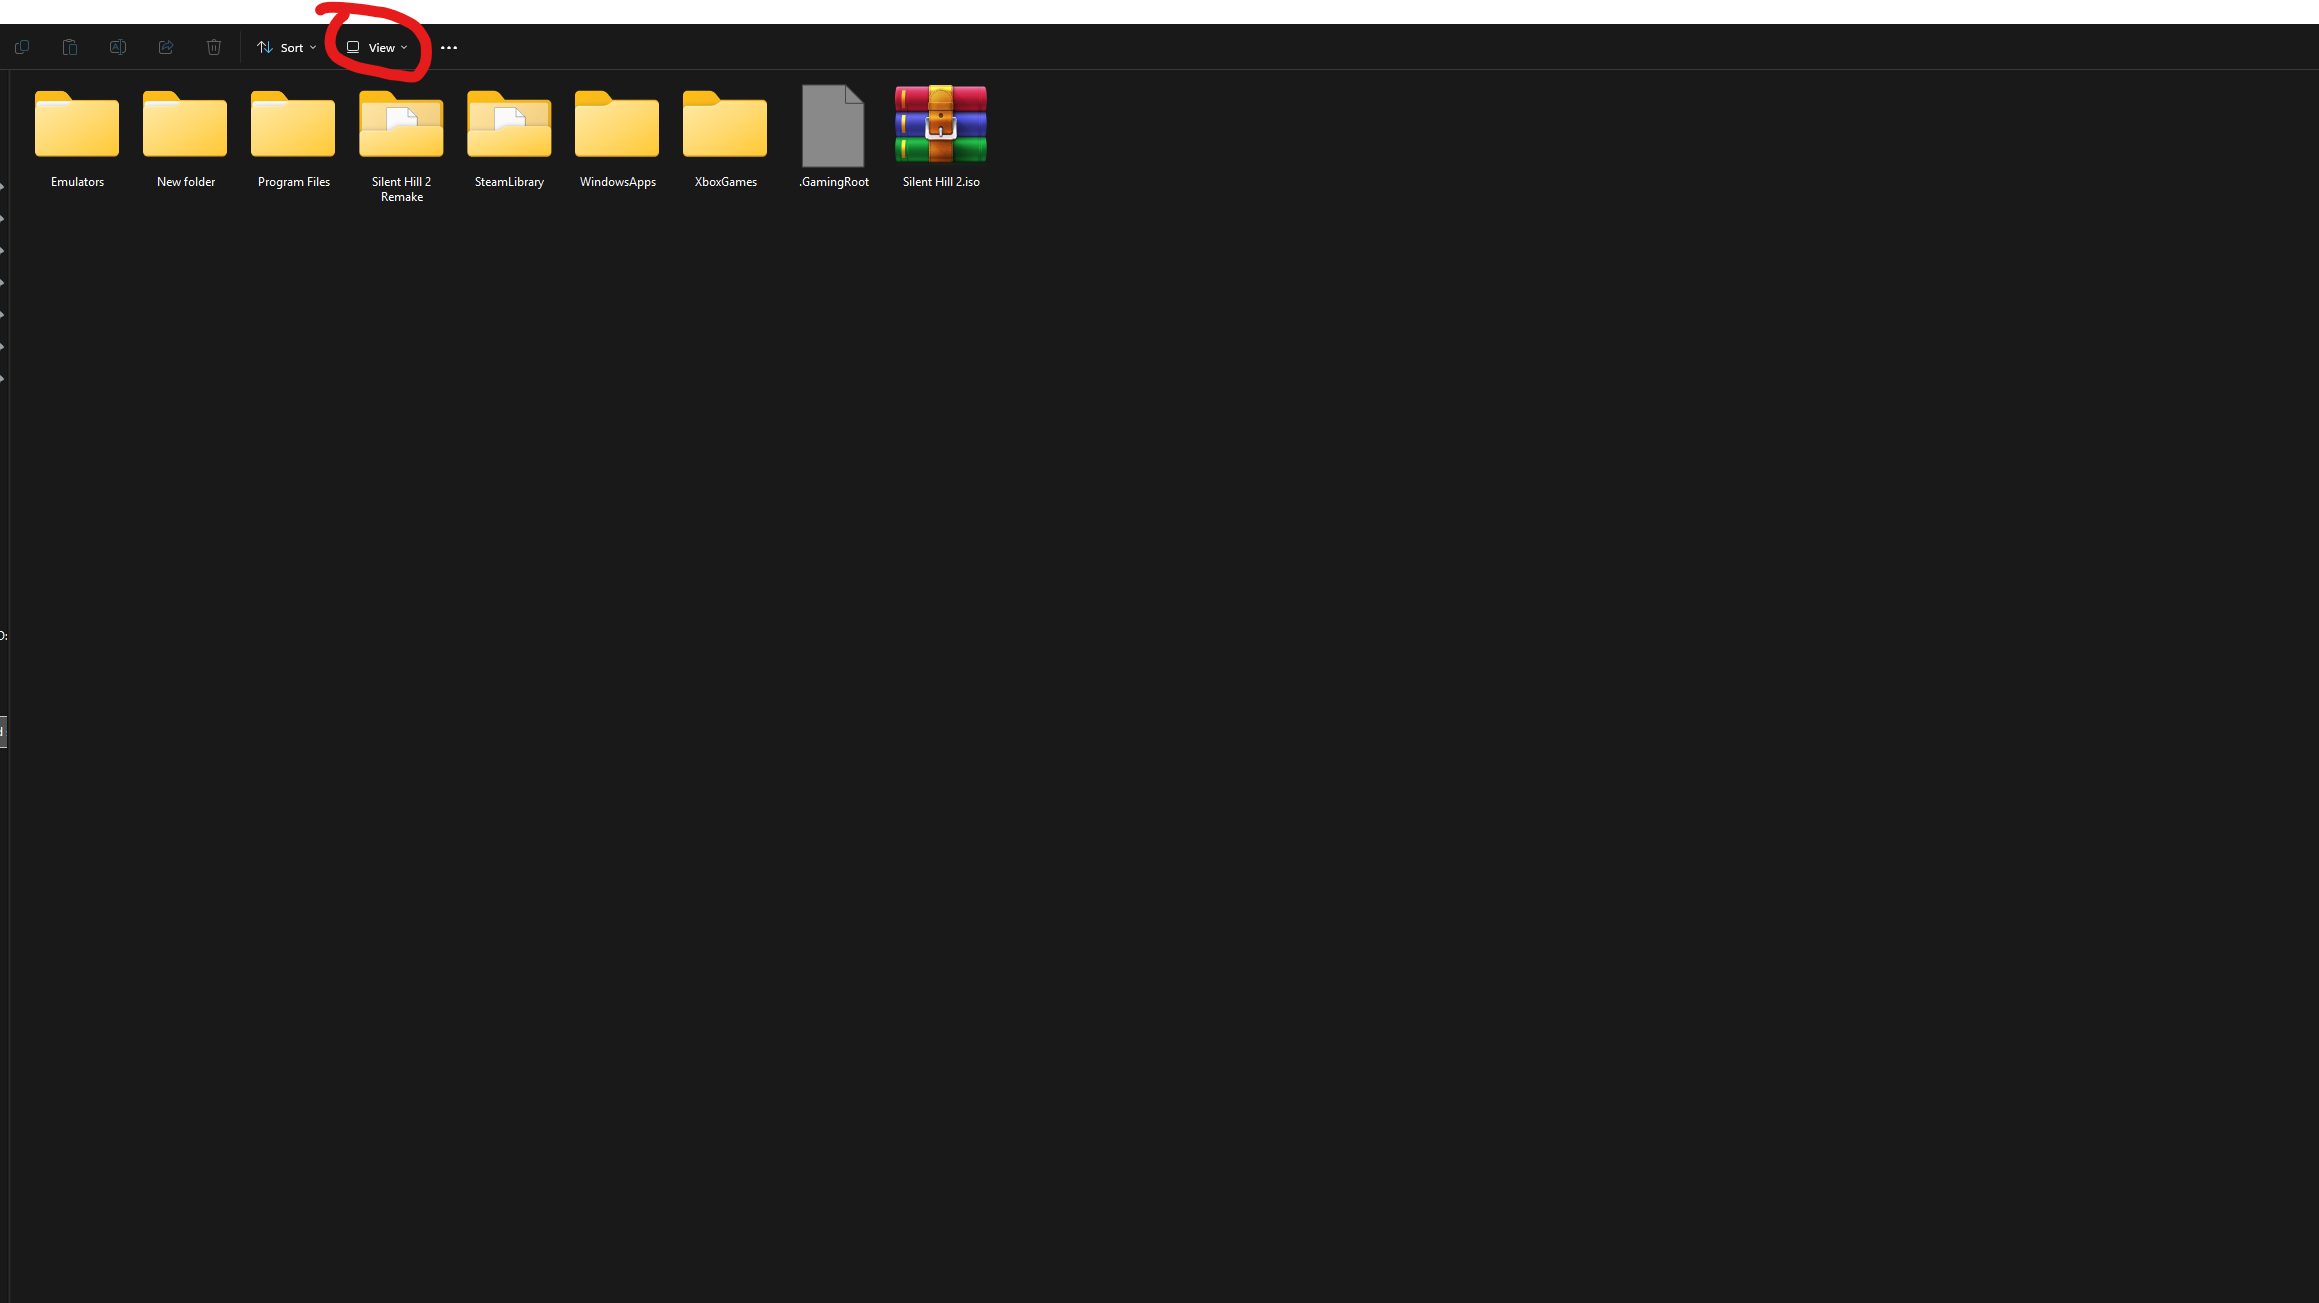
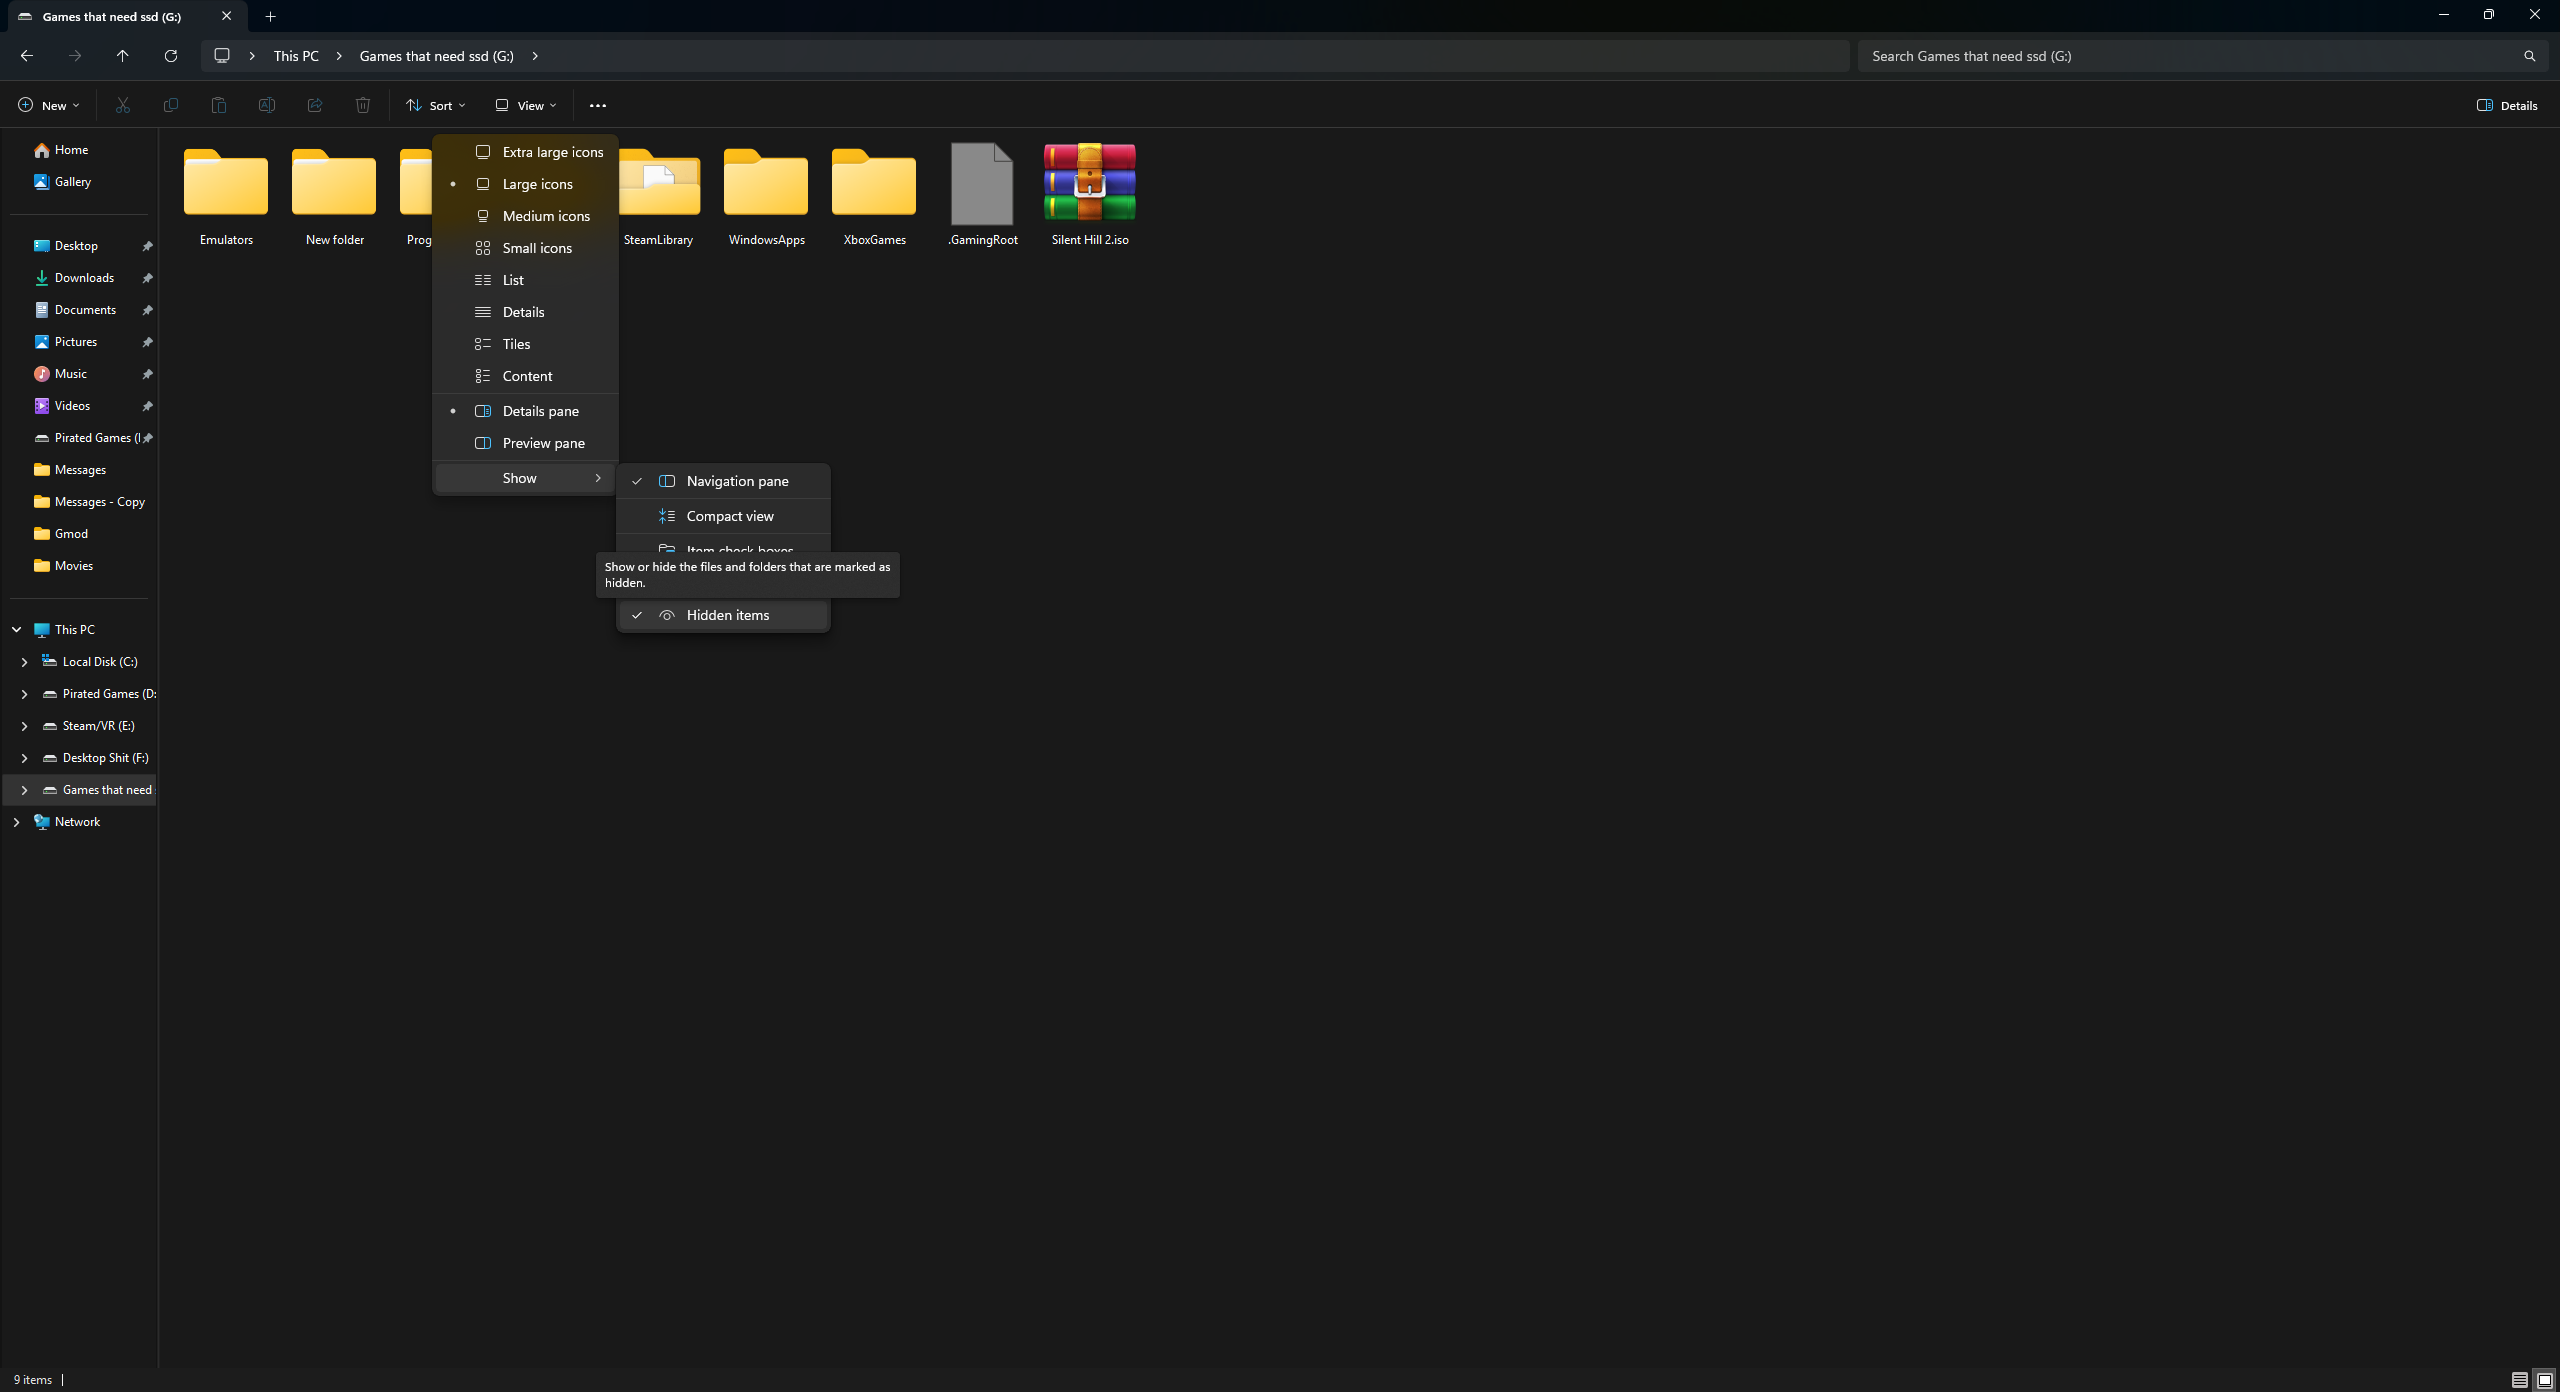
If you are using a flash drive, make sure hidden folders are visible in File Explorer by clicking View, then Show, then Hidden items.
- Open your storage device
- Open the content folder
- You should see a folder labeled 0000000000000000
- All title id games go inside of here
- Now that your games are in GOD format and uploaded to your Content\0's folder
Making your games show up in Aurora
- Boot your console
Before exploiting make sure you are not connecting to the internet at all, no ethernet or wifi connected/enabled if using BadAvatar
- Press start
- Go to content
- enable auto scan for title updates and managed paths
- Then under managed paths click add
- Under select location
- Point it to the content folder
- Set scan depth to INF, and script data to applications
- Back out of the menu and press back
- And press restart
- This will restart Aurora, not the console. You should now see your games.